 Programming
  Protecting an image with the use of Flash comprar viagra en españa
comprar viagra online
comprar viagra generico barato
comprar cialis generico online
comprar cialis online seguro
| Protecting an image with the use of Flash |
|
It's been a while since I wrote my last Flash / Actionscript tutorial. But lately, I got several requests on different Flash tutorials so I decided to start up the program once again. Many websites don't want their images to be copied. You can add a (hidden) watermark, slamming your logo several times on the image or let it carry a secret file, but I wanted a totally different approach. I wanted to protect my images using Flash and more important: It should be done dynamically. 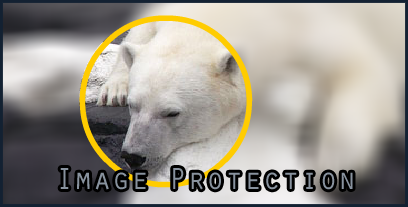 Before I'm going to start with this tutorial, I recommend you to check out my demo on what we'll be creating. I'm telling you: Those images are loaded dynamically using external JPG files. Can you find the real images? You can download the source and demo code if you don't feel like following this tutorial. You'll only need to change the XML file and you're done. The setup For this tutorial, you'll need at least the following:
A (web)server supporting PHP for the last step isn't a must. Everything checked? Start up Flash CS3 and go on to the next step. Flash CS3 Create a new Flash FLA file, using Actionscript 2.0. Change the properties of your document. The dimensions need to be the same size as your JPG file so that's up to you. I recommend a higher frame to make it prettier for the eyes: A framerate of 24 will be enough. 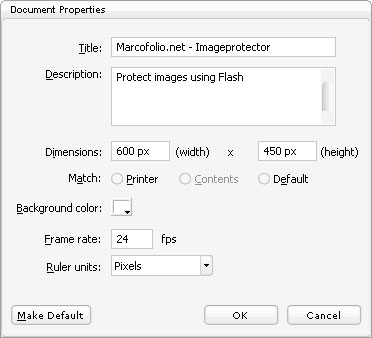 Draw a rectangle using the Rectangle tool having the same size as your background. Position it at X = 0 and Y = 0 by changing the properties. Now Right click on the rectangle and click Convert to Symbol.. A pop-up will appear. Make sure you have set the radio box to Movie Clip and give it a name like 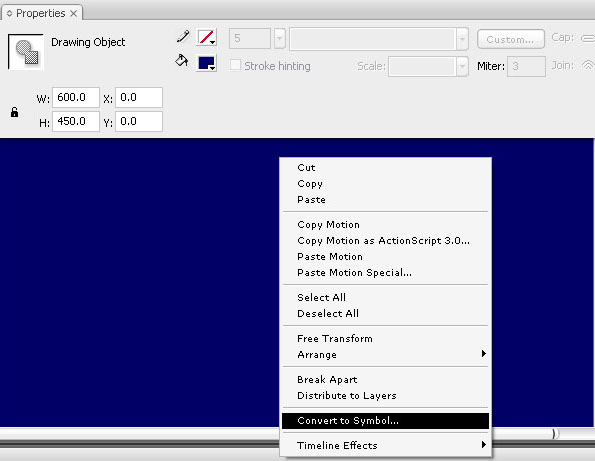 Now change the properties of your newly created movieclip that will be containing our image. Give it a name that we'll be using later for ActionScripting. I called it 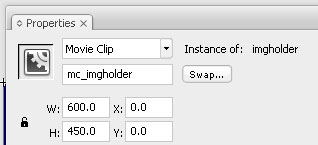 Repeat the previous steps (Create a rectangle on a new layer, converting it to a movieclip named 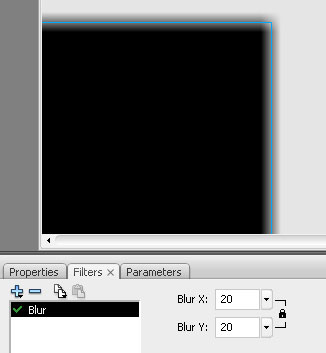 Make sure you place the "blurryholder" behind the "imageholder" for the next step. 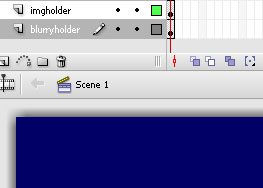 Now let's create the lens that will clear the blur. Draw a circle by selecting the Oval tool, then Shift+Drag to create a perfect circle. Convert it to a Movie Clip with the name 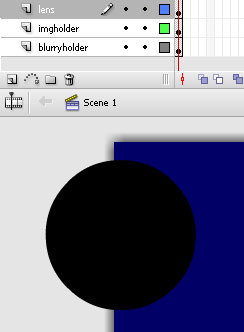 Right-click on the Lens-layer and select Mask. A mask is now created. Everything where the lens is placed, the image is visible. If not, the blurry image will be shown. 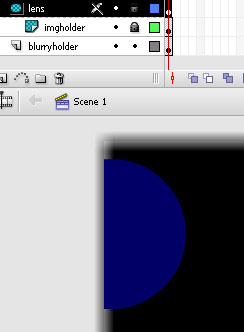 I created a big error box called 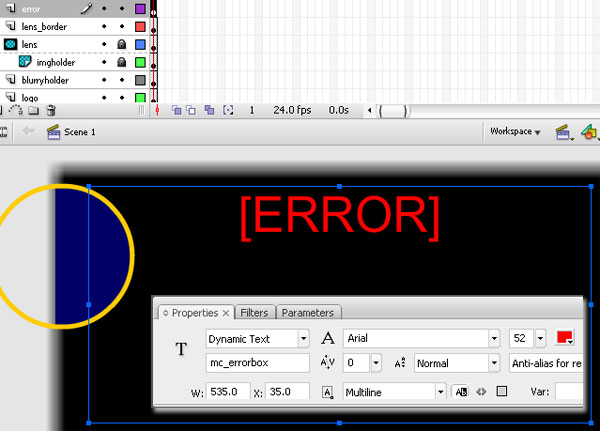 For our final step, I added a "hidebox", to slowly show the image to the user. This was just because if the image is directly loaded, the user would see the original background colors (image not yet loaded). So the 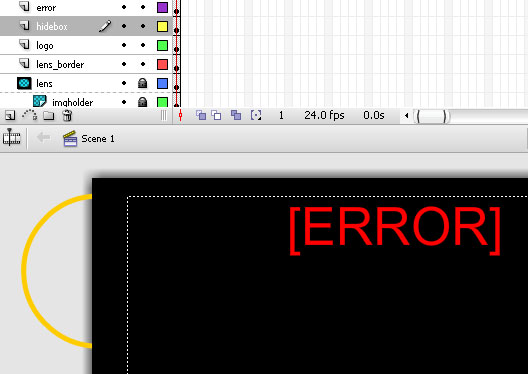 Save your file and press Ctrl+Enter to test your movie. Nothing should happen at this point. In the same directory as your FLA file is saved, a SWF file is created. In this same folder, add your image(s) you want to protect. I'll be using a photo of a leopard that I got from stock.xchng and called it  So, you're all ready with the Flash elements? You should have the following movieclips in your library:
Correct? Let's go on to the next step. XML The XML file is they key to our success. This is the file where a secrect request code is converted to the real image. Start up Notepad, by going in Windows to Start > Run, enter "notepad" and press "OK". Write the following lines in Notepad: <img req="87fe3409" img="leopard.jpg"/> <img req="0987fds3" img="polarbear.jpg"/> <img req="98q3Few6" img="gorilla.jpg"/> <img req="7869fd3X" img="wolf.jpg"/> Now, when requestcode Save your file as an XML file by going to File > Save as. Change the type and give it a .XML extension. The name of the file should not easily be guessed, so don't name it "protected_images.xml" or something like that. Remember, this is the key to our success; if the XML is leaked out, all effort will be done for nothing. I called my file " ActionScript Time for some action! Go back to Flash CS3 and create a new layer on top above all other layers. Press F9 to bring up the ActionScript panel. Enter the following code (Comments are added to explain what it does). // Hide the error box, otherwise user would see a flashy error mc_errorbox._visible = false; // The requestcode that is used from the XML file var requestCode = "87fe3409"; // Load the XML file var xmlData = new XML(); xmlData.ignoreWhite = true; xmlData.onLoad = processXMLData; xmlData.load("kjhsdfakljfpoewaufxz.xml"); // Hide the mouse for users Mouse.hide(); // When XML data is loaded, execute this function function processXMLData(success) { if (success) { // Variable to check if the image is loaded var imgFound = false; for (i = 0; i < this.childNodes.length; i++) { if (requestCode == this.childNodes[i].attributes.req) { // When requestcode from FlashVars is the same as the // requestcode from the XML file, the image is found. // Load the images in the movieclips imgFound = true; loadMovie(this.childNodes[i].attributes.img, mc_imgholder); loadMovie(this.childNodes[i].attributes.img, mc_blurryholder); } } if (imgFound == false) { mc_errorbox._visible = true; mc_errorbox.text = "Image could not be found."; } } else { mc_errorbox._visible = true; mc_errorbox.text = "XML file could not be loaded."; } } var showingHidebox = 100; _root.onEnterFrame = function() { // Slowly show the image hidebox._alpha = showingHidebox; if (showingHidebox != 0) { showingHidebox--; } // Let the mc_lens slowly follow the mousemovement with (mc_lens) { _x += (_root._xmouse-_x)*.1; _y += (_root._ymouse-_y)*.1; } // Let the mc_lens_border slowly follow the mousemovement with (mc_lens_border) { _x += (_root._xmouse-_x)*.1; _y += (_root._ymouse-_y)*.1; } } Now press Ctrl+Enter to test your movie. You should now see the protected image with a mouse-follower that was requested by the Implementation The page gives a request code to the Flash file. The Flash file checks the XML file to locate the image and displays it. Sounds easy, doesn't it? But how does the page tell the Flash file which request code to insert? This can be done using FlashVars. I don't like the <script type="text/javascript" src="swfobject.js"></script> Now add the following code inside your <div id="flashcontent"> <strong>You need to upgrade your Flash Player</strong> </div> <script type="text/javascript"> // <![CDATA[ var so = new SWFObject("imageprotector.swf", "Image Protector", "600", "450", "6", "#FFFFFF"); so.addVariable("flashVarCode", "87fe3409"); so.write("flashcontent"); // ]]> </script> Now, the first The key to this is the Now the last step is telling the Flash file that it received a variable through FlashVars. Just change the code that you hardcoded in your Flash file before to the name of the variable. This is what it was: var requestCode = "87fe3409";This is what it should be: // Read the requestcode passed through FlashVar var requestCode = flashVarCode; There you have it! Now you should be able to dynamically protect your images using Flash and a secret code. Download If you don't want to follow this tutorial step by step, you can download my source code and demo pages. The demo pages include a static HTML page, a dynamic PHP page and a page displaying multiple images with image protector. Conclusion I know this technique isn't water-proof, since people can decompile the Flash source and locate the XML file. Another option is that you print screen every piece of the image that is not-blurred. But still, that's a lot of effort most people would not take. Anyway, for the future you could think about adding more FlashVars, for example changing the color or size of the lens. What about an option to automatically resize the image to fit the Flash file (or otherwise: auto-resize the Flash file to fit the JPG file). For now, this is a pretty fun way to protect your images using Flash. Tags: flash actionscript jpg xml tutorial Interested in this topic? You might enjoy another article I've written called |
| < Prev | Next > |
|---|
| Search |
|---|
| Or try the sitemap |


