
Something totally different here today. To help my girlfriend with her study, I needed to create an app that displays an augmented reality world. Although I love working with HTML and technologies around it, something like AR with it is possible, but doesn’t reach the level of a native app. During my day job, I’m working with (mobile) C# technologies like Xamarin. I was looking for something that’s easy for me to learn and use, in order to create an awesome AR application.
In this tutorial, I’ll be showing you how to create a simple augmented reality world using Vuforia. The reason I choose the framework, was because it looked easy, is free and – most importantly – relies on the same technology Xamarin uses. The small hiccups you might notice in the video, isn’t actually the application, but AirPlay losing some frames; on the iPad it runs pretty smooth. you Now let’s see how you’ll be able to create something like this. Let’s get started!
Prerequisites
To get this awesome app up and running, you’ll need to have the following:
- Vuforia Unity Extension (Free). Currently 2.8.7 is the latest version.
- Unity (Free).
- Apple Developer account ($99 / year).
- Xcode (Free)
- Physical iOS device (not emulator), like an iPad.
- A 3d model to render, supported by Unity. I’ll be using Yoshimitsu from Tekken Tag Tournament.
- A target image. This is the image we’ll be scanning, so it needs to be printed on paper as well. For this tutorial, I’ll be using one of my older textures.
As you can see, this app is created for iOS (that’s why you’ll need an Apple Dev account and a device itself as well). Vuforia / Unity is cross-platform, so this should work for Android as well. I haven’t tried it yet.
Target manager
After everything is installed and set up, you’ll need to go to the Target Manager from Vuforia. We’ll be uploading the target image here. Make sure you’ll select an image that has a high feature amount of features. The target manager will help you though.
Create a database, give it a name and add a target. I used the following settings:
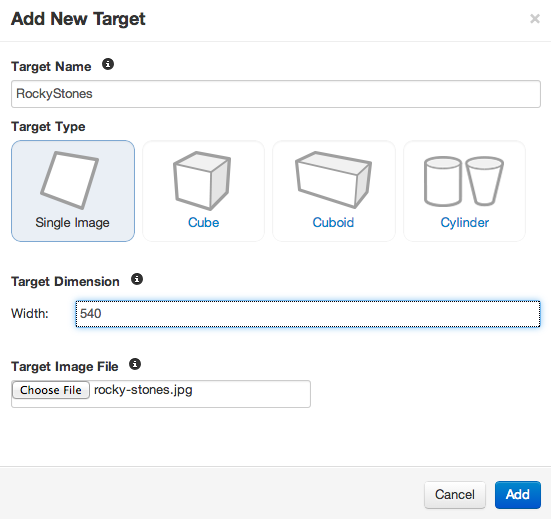
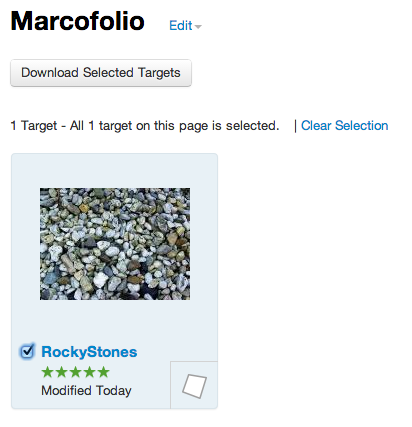
After the upload is complete, Vuforia will check how augmentable the image is by giving it a star rating. Your goal will be to use images that have a high star rating, and some image enhancement tricks might help. Select the target in Vuforia and click the "Download Selected Targets"-button.
Select Unity Editor in the pop-up that follows, which will allow you to download a .unitypackage file with your target. Save this file on your disk.
Unity: Project start
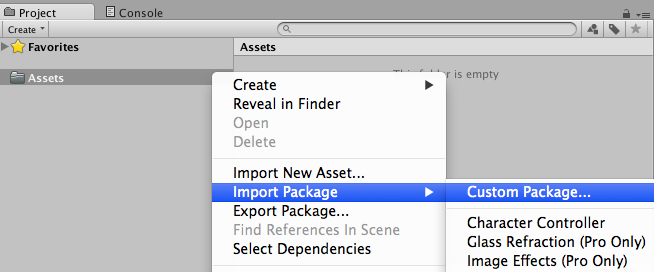
The next step is to start up Unity. Create a new (empty) project on a selected location. When the project is loaded, delete the Main Camera in your Hierarchy to start with a clean plate. We now need to import the Vuforia .unitypackage files (both the SDK and the image target).
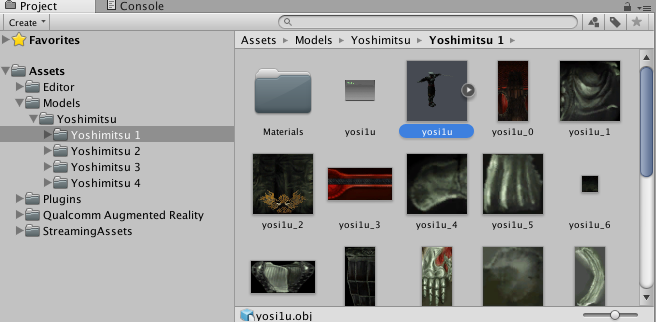
After your import is done, your Project should look like this.

To complete this step, it’s useful to directly load the model that we want to show in our augmented reality world. In my opinion, this is the easiest way:
- Right-click the Assets-folder in the Project
- Select "Reveal in Finder" (Probably "Reveal in Explorer" on a Windows machine)
- Open the Assets-folder
- Create a new folder named Models (or any other, logical name)
- Place the model (incl. all the textures etc.) inside thie folder
- Go back to Unity
Unity will detect the changes you’ve made to the Assets-folder, and will update itself with the latest information.
Now that we have everything complete in Unity, we can start building our world!
Unity: Build the augmented reality world
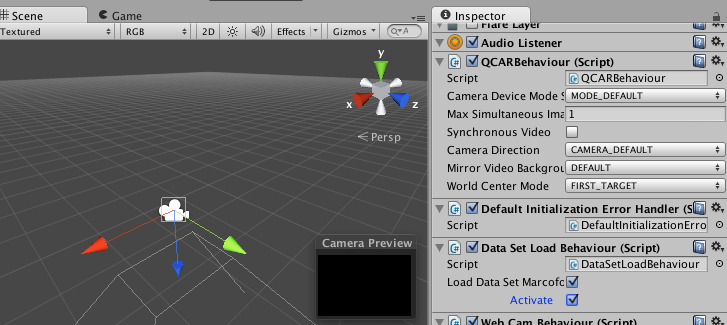
On to the most fun part of this tutorial – actually creating your AR world! First, we’ll need to do the following: In your Project windows, open the Assets/Qualcomm Augmented Reality/Prefabs-folder. In here, you’ll find the ARCamera. Drag it into your Scene. With the ARCamera still selected, scroll down in the Inspector and make sure you Load the Data Set with your Database (the Image Target), and set it to Active as well.
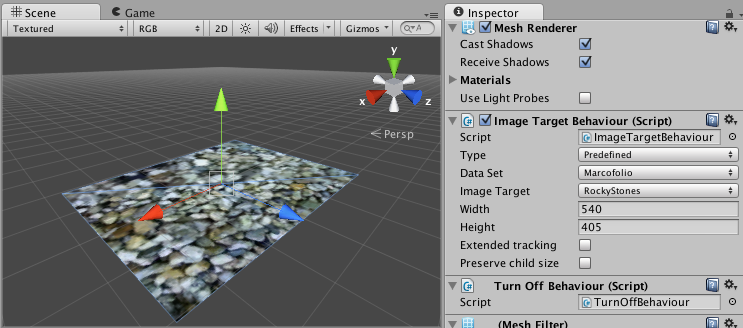
From that same Prefabs-folder, drag an Image Target to the scene. With the Image Target still selected, scroll down in the Inspector and set your Data Set (Database name) as well as your Image Target. Your Image Target should now be visible (you might need to scroll in order to zoom in/out).
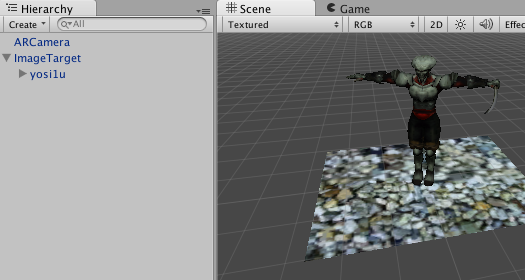
Now, we’ll need to add the model to the Image Target. Simply drag the model that you added in your Assets-folder to the scene. In your Hierarchy, make sure the model is under the Image Target. You might want to change the position of the model, change the values of the Scale / Rotation (inside the inspector) to get it into the right place. This might need some experience with the program, but once you got the hang of it, it’s pretty simple.
From here on, it actually is your own creativity that can do all the work! Add more models to the scene (trees for example) to get an even cooler world. Just some tips:
- Add some light to your models by going to GameObject > Create Other > Directional Light. This way, you can create a light source to light up your model.
- Make sure the models are placed under the Target Image in the Hierarchy.
- When using multiple image targets, make sure you set the correct amount of image targets inside the ARCamera (Inspector > Max Simultaneous Image Targets).
Don’t forget to Save your Scene before Deployment.
Deployment
Now to get this thing into your iPad. I assume that you already have some knowledge about iOS development (since you already got your license), you’ll need to know your App Identifier (since that will be used as your Bundle ID). Inside Unity, go to File > Build Settings. If your scene isn’t in the current build, press the "Add Current"-button. Now select iOS as Platform, and go to Player Settings…
The inspector will show up, and you can leave most of the settings to it’s default value (for now). The only thing you’ll need to change is the Bundle Identifier (found under Other Settings). Set this to the one you’ve created in the Apple Developer Center, and you’re done!
Connect your iOS device and press Build and Run. Wait a while; Unity will now kick up XCode and deploy the application to your device. When it’s loaded, it should start automatically and you’re ready to scan your printed image target. Have fun!
Conclusion
When I first tried Vuforia, I went ahead and started using the native iOS SDK. The learning curve was way to steep for me, since I’m not an Objective-C programmer, but especially have since I have no knowledge about OpenGL ES (that allows the 3d rendering). With the help of their awesome Unity plugin, it allows a low entry level into the world of Augmented Reality.
This tutorial was a pretty basic tutorial, just to get you up and running. If you want, you can also get more details in the official Getting Started guide. Using Unity, we can also script some awesome things inside the game, which I might be able to show you next time. So, what about you? Are you going to try this sometime? Or do you have any other insights? Let me know.


1 comments On Introduction into Augmented Reality with Vuforia
its possible to open a unity vuforia AR for android and IOs, in Xamarin