Placed in: Home  Art Create a summertime compilation poster comprar viagra en españa
comprar viagra online
comprar viagra generico barato
comprar cialis generico online
comprar cialis online seguro
comprar viagra online
comprar viagra generico barato
comprar cialis generico online
comprar cialis online seguro
| Create a summertime compilation poster |
|
As some of my readers will know, I've been on a vacation for a while. I wanted to share the summertime feeling with everyone by creating a summertime compilation poster. In this Photoshop tutorial is explained how to create a nice compilation image: Cutting and selecting objects from pictures, placing and combining them in beautiful artwork.  You can download the PSD from this tutorial in the download section. This is the first time I created something using this technique, but I believe the outcome is really good. Summertime compilation poster Start by creating a New File (Ctrl + N). I used a canvas with a size of 600 x 800 px. Grab your Gradient Tool (G) and set it to Radial Gradient. Now create a large gradient with a foreground color of #FEFFC4 and background color of #FDFF65. 
Go to the Pen Tool (P) and make sure it is set to Shape Layers. Create a triangle from the center of your artwork to one corner, making it look like a point, with a color of #FFFFFF. Copy the triangle, rotate it and place it in another corner. Repeat this step until you have all four corners covered. 
Copy all triangles. Use the Free Transform Tool (T) to rotate the copied layers. Hold Shift while rotating, so the spacing between the triangles stays the same. Repeat this step untill you'll have the full circle around. There are brushes to create this effect, but creating your own is always more fun and will come closer to your wishes. 
Find the picture of your person / model you want to add to your artwork. I'll be using a Rocker for mine. Once again, select your Pen Tool (P). Now set it to creating Paths. Draw a path around your model. This step can be pretty time-consuming. When you're done, go to your Paths Palette. Right-click on your Work Path and select Make Selection... In the new window, set your Feather Radius to 5 px. This will give a nice "glow" around your model. Also, set the Operation to New Selection. Now copy your selection to a new layer and delete the old one. Apply a filter to the model to give it a more surreal touch. I applied a Crosshatch found under Filter > Brush Strokes. Use a Stroke Length of 9, Sharpness of 6 and a Strength of 1. 
Add a couple of stars underneath and around the model. To do so, go to your Custom Shape Tool and select the 5 Point Star. Give it a color of #ECECEC. Duplicate, rotate, zoom and replace (just play around) with the stars. You should end up with something looking like this. 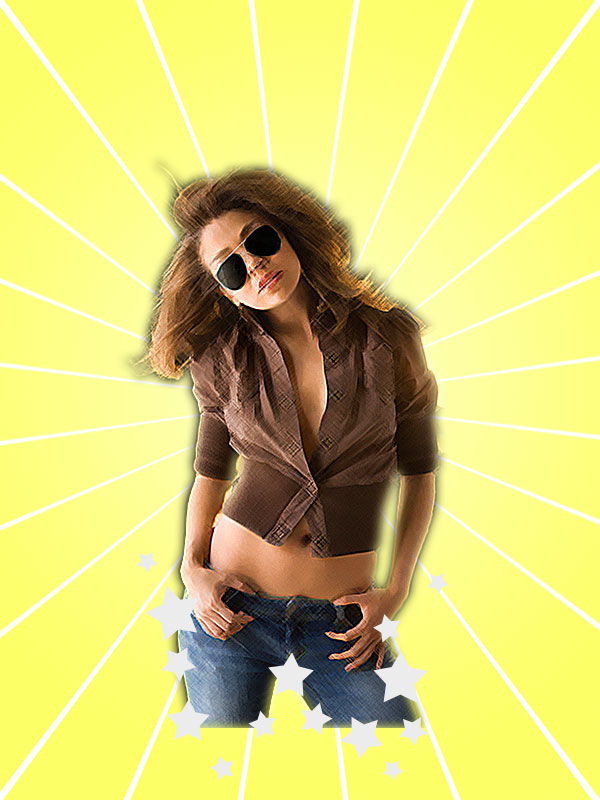
Grab pictures of flowers to add some more color to your artwork and enhance the compilation. I used the picture of a Water Lilly, a Flower 1, a Sunflower and a Water Lily 2. Extract the flowers from the pictures using the Pen Tool (As used in Step 4). This time, set the Feather Radius to 2 px. Place the flowers in your original artwork and make sure you transform them to a Smart Object by right-clicking on the layer with the flower. Now, just like with the stars, duplicate, transform, rotate and replace the flower untill you're satisfied. Make sure you place some flowers on the foreground and some on the background. 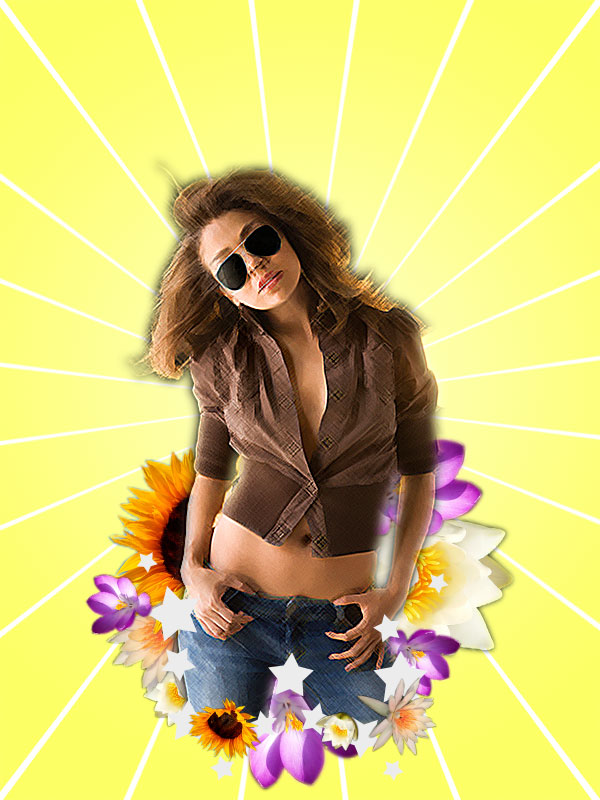
To give the artwork an even more "Summertime" feeling, I added a couple of butterflies. I used the picture of a Shallowtail and an Admiral. Do the same as the flowers: Extract (Pen Tool / Feather Radius: 2), Smart Object, Rotate, Replace, Resize etc. Place them high on your artwork as if they're really flying away. Tip: Use Edit > Transform > Flip Horizontal to flip an object horizontal. 
Use a couple of brushes from the Floral Swirl Brush (Or any other Floral Brush) to give the artwork some more feeling. Give the brush a color of #FFFFFF. Make sure you're on a layer behind all other layers, but above the background. Give the Floral Swirl an Outer Glow by right-clicking on the layer, selecting Blending Options and selecting the Outer Glow. Give it an Opacity of 100% and a color of #FFFFFF. 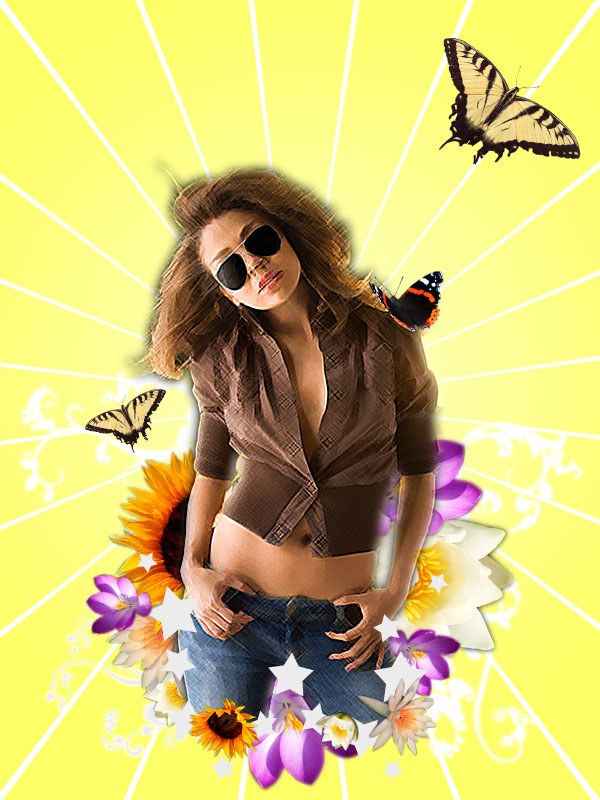
You can call your artwork "Finished", but I wanted to give it some final touches. I created a shiny sparkle on the sunglasses by drawing it using the Pen Tool. I also added the text "Summertime" using a font called Harlow Solid Italic and give it a Drop Shadow. Transform the text to make it look like a wave, just to enhance the summer feeling. Finally, I placed another butterfly on the text. 
Conclusion This technique was new to me, but I believe the outcome is really good. The possibilities of compilations are (of course) endless, since you decide which objects to add. You can download the PSD from this tutorial in the download section. I hope you learned something new today that you can use in the future. If you created artwork following this tutorial, feel free to show it to the rest of us. Tags: summertime compilation poster photoshop tutorial Interested in this topic? You might enjoy another article I've written called |


| < Prev | Next > |
|---|
| Search |
|---|
| Or try the sitemap |
Friends of Marcofolio.net
 2007 - 2018 Marcofolio.net
This (we)blog brings you information about (web)design, blogging tips, (programming) tutorials and much, much more. I can't describe Marcofolio.net in words: Just look around and be amazed. Many (new) visitors have a habit to stick around, just because of the variety of articles.
Have fun reading this blog and don't forget to subscribe to the feed to keep updated on the latest articles.