
Previous week, colleague Willem and I were checking out the mosaic slideshow created by Martin. We were both impressed by his example, but wanted to take it to another level. We discussed on how we could add some features and how it should look like. Willem tranformed this idea to Silverlight and I created an easy to use jQuery plugin that does the same.
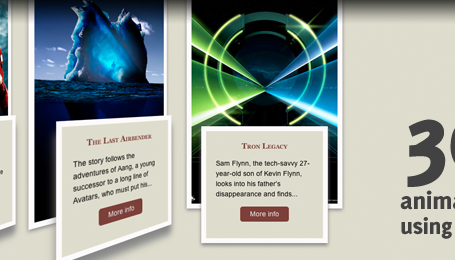
This jQuery plugin called jFancyTile is a tile shifting image viewer. It allows you to tranform any list with images to a beautiful tile shifting photo presenter.
Check out the demo to see the plugin live. It’s very customizable to fit your own needs. Read the rest of this article to see how this plugin works "under the hood".
Take note this plugin is pretty CPU intense and works best when a low rowCount and columnCount is used on relatively small images. Experiment and use with caution. The Silverlight version from Willem doesn’t have this problem.
Video Demonstration
Here’s a video example on how the plugin works on Google Chrome.
How to use
Make sure your HTML looks like the following:
<div id="selector">
   <ul>
      <li><img src="images/img01.jpg" alt="Title 01" /></li>
      <li><img src="images/img02.jpg" alt="Title 02" /></li>
      <!-- More images -->
   </ul>
</div>
The alt attribute from each image will be used to display as the title on top.
Next, include the needed CSS and jQuery files to your HTML head:
<head>
   <link rel="stylesheet" type="text/css" href="css/jfancytile.css"/>
   <script type="text/javascript" src="js/jquery.jfancytile.js"></script>

</head>
Now you’re ready to use the plugin! Feel free to change the CSS file to your needs. To use the default options, simply call the plugin on the selector:
$("#selector").jfancytile();
For more customization, you can change the following input variables (shown are the defaults):
$("#selector").jfancytile({
    inEasing: "swing",    // Easing animation of tiles flying IN
    outEasing: "swing",   // Easing animation of tiles flying OUT
    inSpeed: 1000,        // Animation speed of tiles flying IN
    outSpeed: 1000,       // Animation speed of tiles flying OUT
    rowCount: 8,          // Total number of rows
    columnCount: 13,      // Total number of columns
    maxTileShift: 3       // Max amount of positions a tile can shift
});
That’s all there is to it! You can use the jQuery Easing Plugin for more variations of inEasing and outEasing.
How it works
Now for the most interesting part: How does this plugin actually work?
- Step 1 – Analyze all the images, get their
altattribute, dimensions andsrc. - Step 2 – Create a container by using the biggest image dimensions.
- Step 3 – Remove the list from the HTML.
- Step 4 – Create the navigation buttons and apply them to the container.
- Step 5 – Calculate the number of tiles we need to create based on the
rowCountandcolumnCount. - Step 6 – Create the tiles by creating a
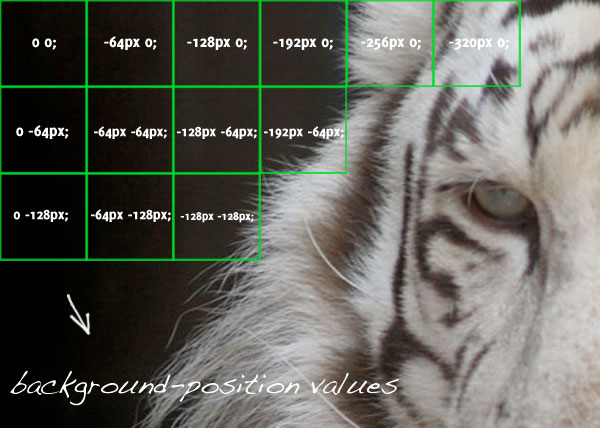
divfor each tile. - Step 7 – Set the
background-imagefor each tile using the image supplied. Usebackground-positionto shift the image to the correct position. - Step 8 – Append the title to the collection of tiles.
- Step 9 – Add functionality to animate the tiles to a random position and fade out.
- Step 10 – Add functionality to animate the tiles to their desired position and fade in.
I think the most interesting step is Step 7, so here’s a reference image (zoomed in) for just that step. We assume each tile has a width of 64px (which is calculated by the script). The background-image source is the one loaded from the HTML.
Known issues
- This is a pretty CPU heavy plugin – when you have too many rows or too many columns, the browser will crash. Like I said in the start of this article, use these parameters with caution. The Silverlight version from Willem is better for the CPU.
- Sometimes, the images couldn’t properly be loaded and the tiles will be really small. A refresh of the page will make it work again, but it’s pretty annoying.
- Chrome and Safari act a little bit differently when displaying the animation when compared to Firefox. When all images have been displayed in Chrome/Safari, the animation is correct.
Conclusion and Download
Besides these downsides of the script, I think it’s a great jQuery plugin that could be implemented on websites as you like. What do you think?
Script can always be improved – feel free to dig in the source code and make any changes necessary!