
Last year, Addy Osmani told me about a "tool" called Yeoman. Although it was a great tip back than, I didn’t directly feel the need to make use of the tool. Until a couple of weeks ago.
While starting another web project, I started downloading the always used framewoks like jQuery and the HTML5 Boilerplate (or making my own boilerplate which holds everything already). This is actually pretty boring, while I really want to start developing! That’s where Yeoman can help out.
At first glance, Yeoman is just a tool that can help you to build web application with ease. But saying so wouldn’t give Yeoman enough credits. As stated on their website, Yeoman 1.0 is more than just a tool. It’s a workflow; a collection of tools and best practices working in harmony to make developing for the web even better. In this article, I’ll try to explain in my words how to work with Yeoman and why it’s so awesome. It can help you become a better allround webdeveloper!
Background / Prerequisites
First things first: Understand that Yeoman actually consists from three different tools:
- Yo – A Scaffolding tool that can help you quickstart your project development.
- Grunt – A JavaScript Task Runner that can do all the dirty work for you, like minification, running unittests, linting etc.
- Bower – A package manager for the web, that can take track of the dependencies of your project.
Before going any further, I just wanted to point out that node.js and Git should be installed on your computer, and optionally, Ruby and Compass (if you plan to use Compass). Also, learn to love your command line. Most of Yeoman has to be executed through the command line, so don’t be afraid to start up yours and get ready to go!
Installation
Yeoman has to be installed through a npm. Simply execute the following command through your terminal.
npm install -g yo
As you can see in the npm Docs, the -g parameter means that it’ll be installed in global mode. npm wil now install Yeoman. Once completed, you can see if it’s successfully installed by executing the following command:
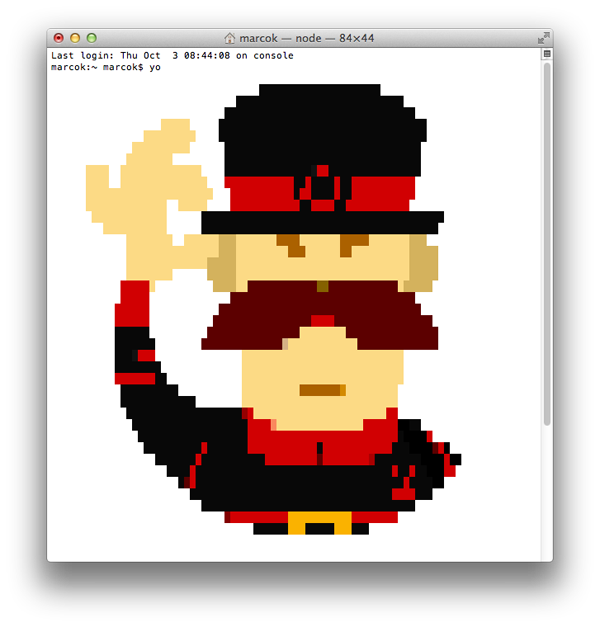
yo
And there you have him! Our friendly guy Yeoman is now living inside your computer.
Quit your terminal for now, we just confirmed that Yeoman is correctly installed.
Generators
Yo uses Generators to scaffold the file and folder structure for you. There are loads and loads of Yeoman Generators created by the community. That way, the community can share their best practices, templates and more that will be used by Yo. The most popular one (at the time of writing), is the Angular generator, giving you a quickstart with Angular development.
In this article, I’ll just install the basic generator for webapps. You’ll need to install this through your command line:
npm install -g generator-webapp
Yo: Scaffold our project

You now have the generator installed which can be used by Yo to scaffold the application. Navigate to an (empty) folder where you want to start your project and let Yo do the magic.
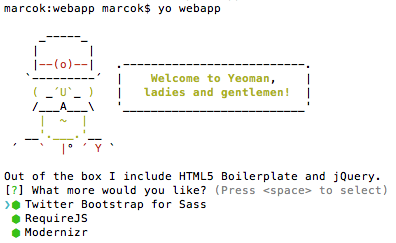
yo webapp
Yeoman will now greet you, with some optional frameworks to be installed (jQuery and de HTML5 Boilerplate are added automatically). In this example, I’ll be installing the Twitter Bootstrap for Sass, RequireJS and Modernizr as well.
Yo will now scaffold out the project. "Wow, that was fast!" Yes, indeed it was! No more downloading of libraries and taking care of boilerplating: Yo has you covered. You can now directly dive into developing.
Directory structure
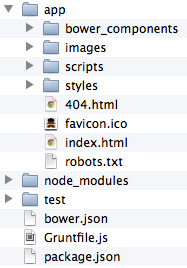
Let’s break this down to the most important files/folders:
/app/:
This will be your main folder where your application will live. You can add your HTML, CSS and JavaScript inside the correct folders, and you might want to play around with additional folders for your project. Don’t forget to change yourfavicon!/bower_components/: This folder will hold the components that are installed by Bower. The generator installed jQuery, Modernizr, RequireJS and the SASS framework for Bootstrap for me, which are all placed inside that folder./scripts/: The scripts-folder will eventually contain your JavaScript. But since it’ll get compiled later by Grunt, it can also contain scripts that need to be compiled later, like CoffeeScript and TypeScript files./styles/: This folder will contain the style of the website: Your CSS. But just like the CSS, this folder will be compiled by Grunt, so CSS that needs to be compiled (SASS / LESS) will be placed here as well.
/node_modules/: This folder will contain all the node packages (or modules) needed for your application. These dependencies can be found in thepackage.json. Don’t touch the contents of this file, since it’s needed to let your build run properly./test/: The test-folder will contain the unittests for the project. Although loads of frameworks are supported, Mocha is the default one.bower.json: Thebower.jsonfile will contain all the dependencies made by Bower, included the used version numbers. In this example, it has references tosass-bootstrap,requirejs,modernizrandjquery.Gruntfile.js: All the steps that will be executed by Grunt are placed inside the Gruntfile. For example, steps for compressing your JavaScript and Images, compiling your CoffeeScript etc. can be found there. Also, the whole configuration for Grunt are placed inside this file.package.json: The overall Node package file with it’s dependencies to other projects.
Bower: Take care of my dependencies

Another tool used by Yeoman is Bower (created by the devs from Twitter). It is used to take care of any dependencies of the project. Simply use the following command to add an extra library (In this case: Underscore) to your application:
bower install underscore
The dependency is downloaded through Git and added to your application. The bower.json file is updated to include that reference.
That’s the whole purpose of Bower, it’s taking great care of your developer dependencies!
Grunt: Do my dirty stuff

Grunt is the tool I’m actually most exited about when it comes to webdevelopment and the Yeoman workflow. With it’s huge number of plugins (once again, maintained by the community), Grunt can do a lot for you. Grunt executes the steps that are defined in the Gruntfile.js. Usually, the Yo generator already included the correct steps for Grunt, but you might want to add something to that later. Grunt is way to big to be discussed in this article, so I suggest you dive into the docs.
For the sake of the Yeoman workflow, I’ll just cover some useful basic commands.
grunt test
Every developer should test their application. By writing unittests (for example in Mocha, QUnit or Jasmine) you can verify the quality of your code. The generator already scaffolded a basic test example, which can be run using the grunt test command. The tests will be run using PhantomJS.
grunt server
So, you want to quickly preview your application without having to install something like XAMPP or IIS as a web server? Grunt has your back! Just run the command, and you’ll be able to see your application.
grunt
This is the heavy step. It builds the application for deployment: the /app/ folder will be deployed to the /dist/ folder and all the steps defined in the Gruntfile.js will be executed. Some of this stuff could be: Compress the JavaScript and images (!), generate source maps, compile your CoffeeScript / TypeScript, compile your LESS / SASS etc. etc. etc. Now everything is ready to deploy to your host and you’re all done!
Conclusion
I think the Yeoman workflow is just great. Although it was pretty new for me to do a lot through the command line, you’ll eventually get the hang of it. I did find it somewhat hard to learn Grunt (and understanding the Gruntfile.js), but everything has a learning curve. I hope you got convinced to try Yeoman and get ready to be amazed!