Placed in: Home  Programming Webdesign Create a mouse follower with smokey trail in Silverlight comprar viagra en españa
comprar viagra online
comprar viagra generico barato
comprar cialis generico online
comprar cialis online seguro
comprar viagra online
comprar viagra generico barato
comprar cialis generico online
comprar cialis online seguro
| Create a mouse follower with smokey trail in Silverlight |
|
Last week, I started experimenting with Microsoft Silverlight. I've never worked with the technique before, but after using it, I was impressed. It works pretty good and the separation of the XAML and CS file is great. Today, we're going to create a Smokey Mouse Follower in Silverlight. This was my first experiment too and pretty fun to see. I have to admit that the layout can be improved in loads of ways, but this tutorial is intended to be for beginner Silverlight users. 
We'll be using Microsoft Expression Blend 3 in this tutorial. Visual Studio will probably give the same effect, but I haven't tested it. We're going to create the program using Visual C#. The images (cursors) I used are from IconFinder. 
 Make sure to check out the demo to see what we're going to create! As you can see, it's not really that useful, but pretty fun to see. Also, it's a great way to get in touch with Silverlight. Let's start! Create the project Create a new Silverlight project, by going to File > New Project (Ctrl+Shift+N). Select Silverlight 3 Application + Website and give the project a name. Make sure the language is set to Visual C#. 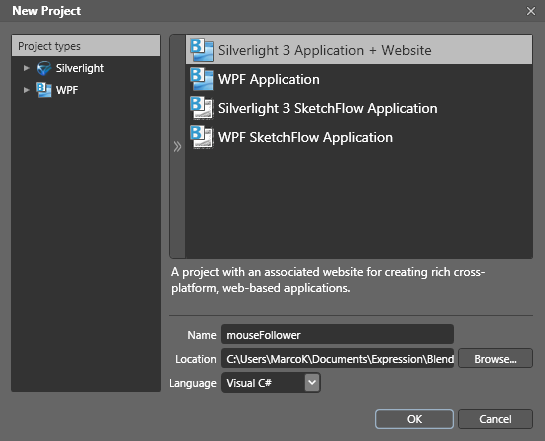
Press OK to create the project. Expression Blend now creates several files for you. In this tutorial, we'll only focus on the 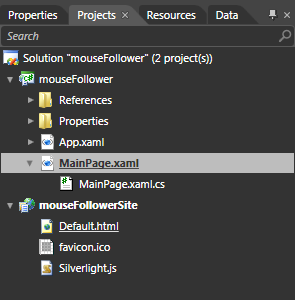
XAML (UI) There are two views to the 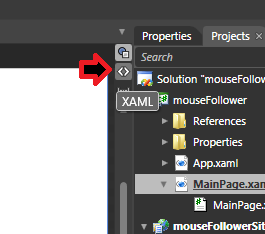
ExpressionBlend already created the "Stage" for you, by defining a <UserControl xmlns="http://schemas.microsoft.com/winfx/2006/xaml/presentation" xmlns:x="http://schemas.microsoft.com/winfx/2006/xaml" x:Class="mouseFollower.MainPage" Width="640" Height="480"> <Grid x:Name="LayoutRoot" Background="DarkGray" Cursor="None" MouseMove="LayoutRoot_MouseMove" <Image Source="http://demo.marcofolio.net/silverlight_mousefollower/images/cursor.png" x:Name="cursor" Width="16" Height="16" HorizontalAlignment="Left" Margin="0,0,0,0" VerticalAlignment="Top" /> </Grid> </UserControl>
Now to get some code behind this page and create the actual mouse follower! XAML Code Behind (CS) In our previous step, we were trying to call a function in our code behind that didn't excist: using System; using System.Windows; using System.Windows.Controls; using System.Windows.Documents; using System.Windows.Ink; using System.Windows.Input; using System.Windows.Media; using System.Windows.Media.Animation; using System.Windows.Shapes; // The following namespaces are added from the default using System.Windows.Media.Effects; using System.Windows.Media.Imaging; using System.Windows.Threading; using System.Collections.Generic; namespace mouseFollower { public partial class MainPage : UserControl { /// <summary> /// List that will contain references from the images in the mouse trail. /// </summary> private List<Image> trail = new List<Image>(); public MainPage() { // Required to initialize variables InitializeComponent(); StartTimer(); } /// <summary> /// Event that gets called when the mouse is moved over the layout (root screen). /// </summary> /// <param name="sender">Sender</param> /// <param name="e">Mouse event</param> private void LayoutRoot_MouseMove(object sender, System.Windows.Input.MouseEventArgs e) { // Retrieve X and Y position of the mouse double xPos = e.GetPosition(null).X; double yPos = e.GetPosition(null).Y; // Create a new image - Copy of the cursor for the trail Image copyImg = new Image(); copyImg.Source = cursor.Source; copyImg.Width = cursor.Width; copyImg.Height = cursor.Height; copyImg.Margin = new Thickness(xPos, yPos, 0, 0); copyImg.Effect = new BlurEffect { Radius = 5 }; copyImg.Opacity = 1; copyImg.HorizontalAlignment = HorizontalAlignment.Left; copyImg.VerticalAlignment = VerticalAlignment.Top; // Add the newly created image to the trail list trail.Add(copyImg); // Add the newly created image to the layout LayoutRoot.Children.Add(copyImg); // Place the current cursor on the mouse position cursor.Margin = new Thickness(xPos, yPos, 0, 0); } /// <summary> /// Timer to added to the page to use a delegate. /// </summary> public void StartTimer() { DispatcherTimer myDispatcherTimer = new System.Windows.Threading.DispatcherTimer(); myDispatcherTimer.Interval = new TimeSpan(0, 0, 0, 0, 100); // 100 Milliseconds myDispatcherTimer.Tick += new EventHandler(FadeTrail); // Every 'tick' (100 Milliseconds), the "FadeTrail" function is called myDispatcherTimer.Start(); } /// <summary> /// Delegate to be called once the timer is called to fade out the cursor trail. /// </summary> /// <param name="o"></param> /// <param name="sender"></param> public void FadeTrail(object o, EventArgs sender) { // Loop through all images in the trail and change the dimensions + opacity foreach(Image trailimg in trail) { trailimg.Opacity -= 0.1; trailimg.Width += 2; trailimg.Height += 2; } } } } That's all we need! Try to build + run the application (F5) and let's see what we got so far. 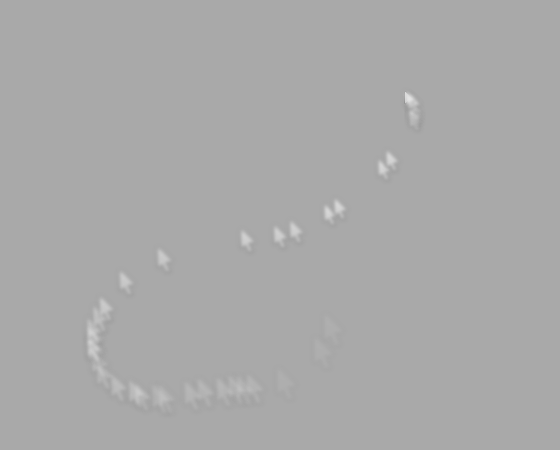
Looks pretty nifty, doesn't it? We've got our mouse follower and the puffy smoke effect! By using the delegate Cursor changer For a small extra effect, I wanted to make it possible for the user to "click" with the mouse and get another type of cursor. This is pretty easily achieved by doing the following: First, open your XAML file (
MouseLeftButtonUp="LayoutRoot_MouseLeftButtonUp"
This means, that when a user clicks on the Go back to your code behind file ( /// <summary> /// Variable to store which cursor is currently showed. /// </summary> private int currentcursor = 0; /// <summary> /// List that will contain the URL's to cursors that we can use (images). /// </summary> private List<String> cursors = new List<String>(); Inside the cursors.Add("http://demo.marcofolio.net/silverlight_mousefollower/images/arrow_circle_double.png"); cursors.Add("http://demo.marcofolio.net/silverlight_mousefollower/images/plus_circle_frame.png"); cursors.Add("http://demo.marcofolio.net/silverlight_mousefollower/images/multimedia-player-apple-ipod.png"); cursors.Add("http://demo.marcofolio.net/silverlight_mousefollower/images/apple.png"); cursors.Add("http://demo.marcofolio.net/silverlight_mousefollower/images/cursor.png"); Now, we'll define the function that is called when the user clicked on the Grid. This is the function we defined in the XAML file: /// <summary> /// Event to be called when the user clicked on the layout (root). /// </summary> /// <param name="sender">Sender</param> /// <param name="e">Mouse event</param> private void LayoutRoot_MouseLeftButtonUp(object sender, System.Windows.Input.MouseButtonEventArgs e) { // Change the cursor image Uri uri = new Uri(getNextCursor(), UriKind.Absolute); ImageSource imgSource = new BitmapImage(uri); cursor.Source = imgSource; } As you can see, the function called /// <summary> /// Retrieve the next cursor image url. /// </summary> /// <returns>The new image url.</returns> private string getNextCursor() { currentcursor++; if(currentcursor >= cursors.Count) { currentcursor = 0; } return cursors[currentcursor]; } That's it! We're not complete and done with the mouse following that changes when the user clicks on the Grid. 
Conclusion and Download Although this isn't a very useful effect, it's pretty fun to play around with and great if you never played with Silverlight before. This was my first experiment too!
Feel free to leave a comment, sharing your thoughts! Tags: silverlight expression blend mouse follower smoke tutorial Interested in this topic? You might enjoy another article I've written called |


| < Prev | Next > |
|---|
| Search |
|---|
| Or try the sitemap |
Friends of Marcofolio.net
 2007 - 2018 Marcofolio.net
This (we)blog brings you information about (web)design, blogging tips, (programming) tutorials and much, much more. I can't describe Marcofolio.net in words: Just look around and be amazed. Many (new) visitors have a habit to stick around, just because of the variety of articles.
Have fun reading this blog and don't forget to subscribe to the feed to keep updated on the latest articles.